My Art Classroom
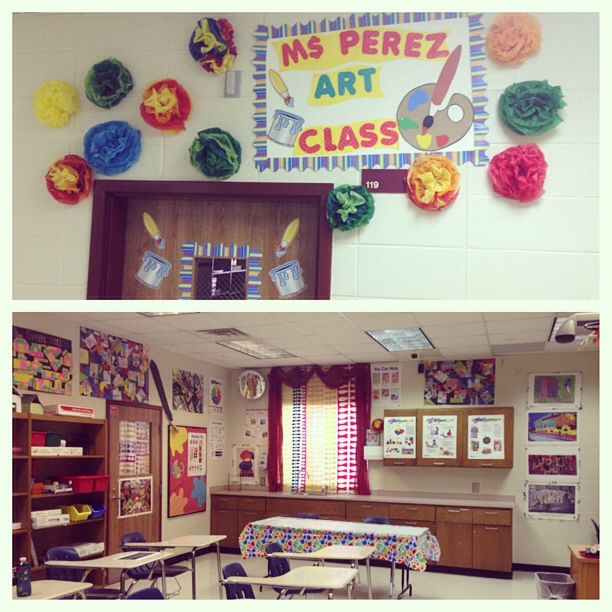
My Art Classroom

Here my second and third grade students had a Crazy Hair Day while learning about the 7 Lines of Design.


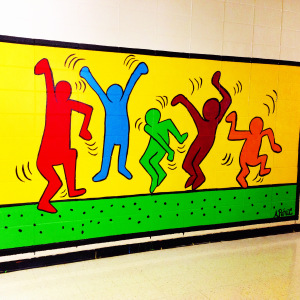
Here is another Mural I did at the school that I teach.
Inspired by the Great Keith Haring!

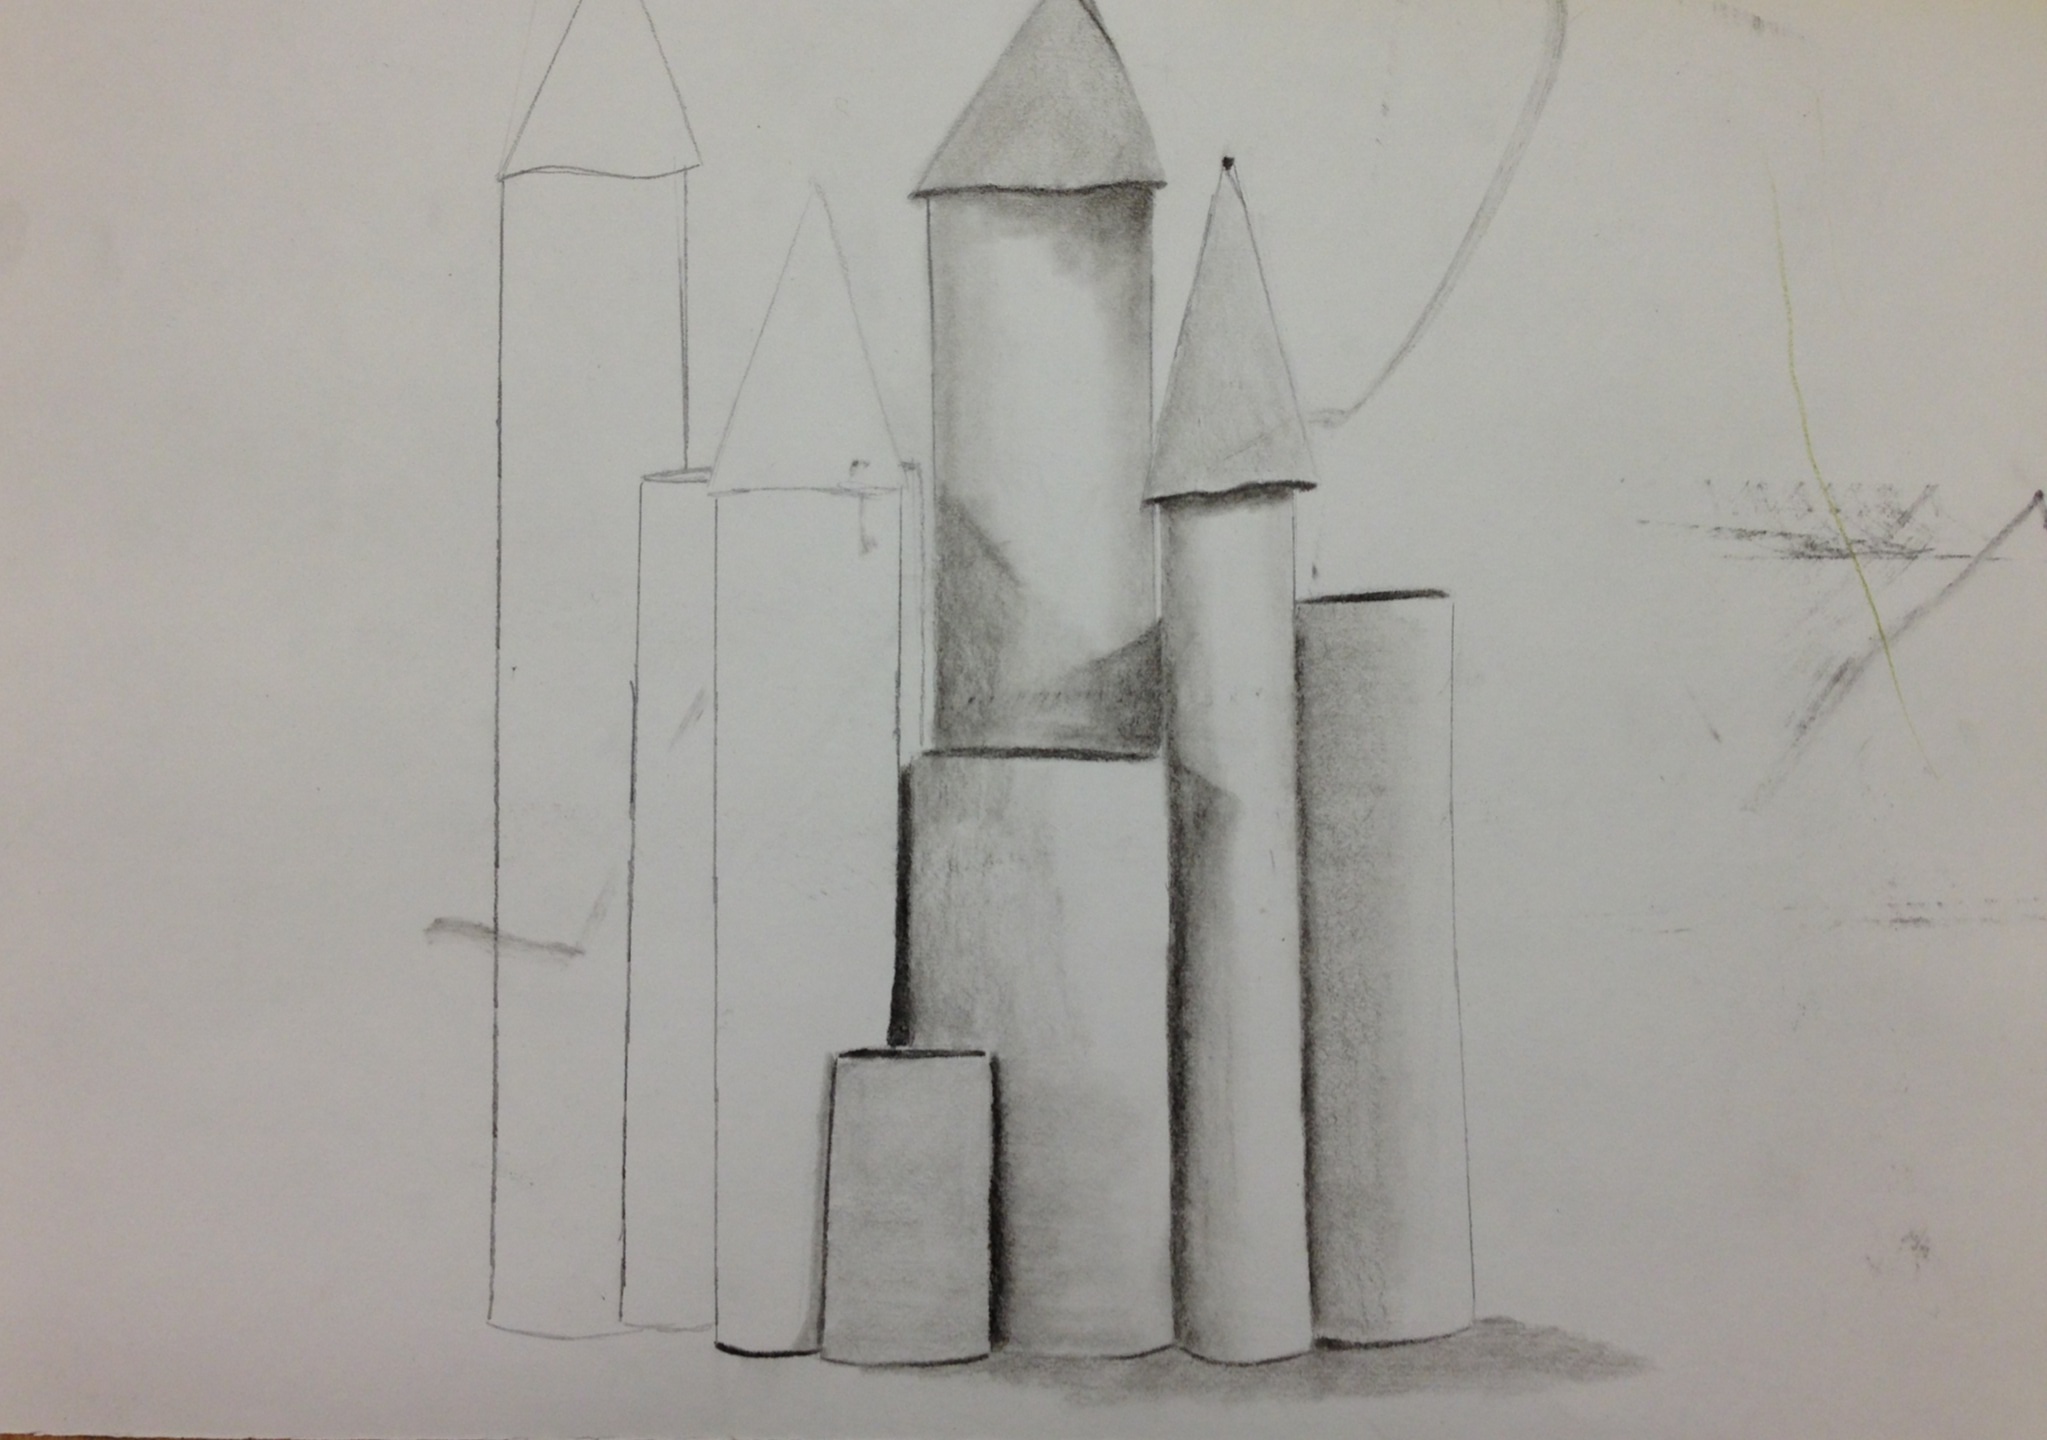
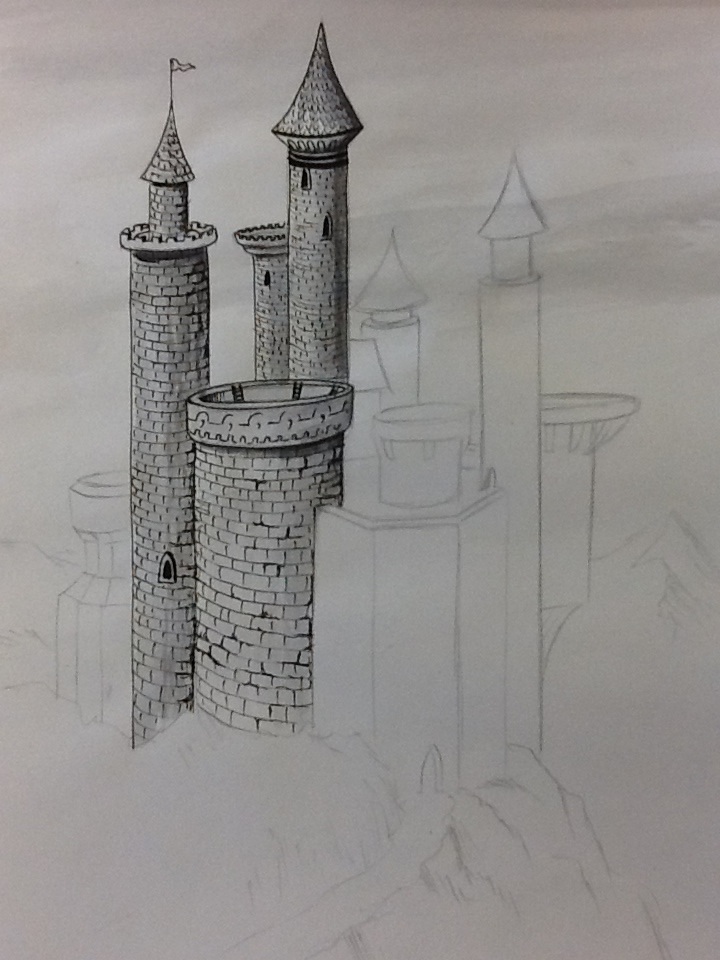
 My example I delibrately did wrong to point out to my students how in some areas the lines, bricks and roof tops are done incorrectly.

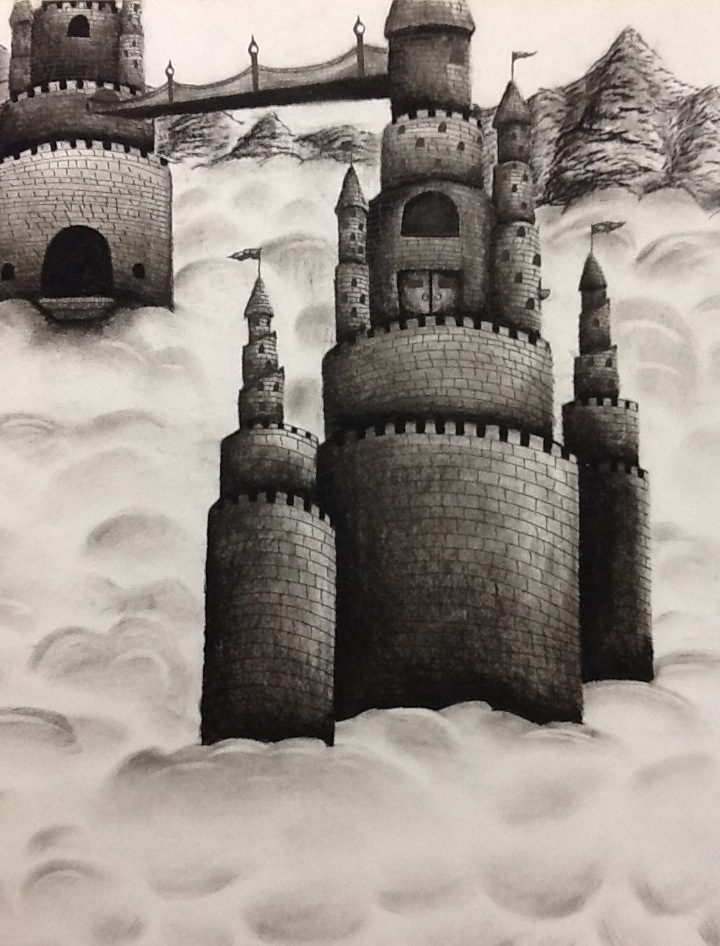

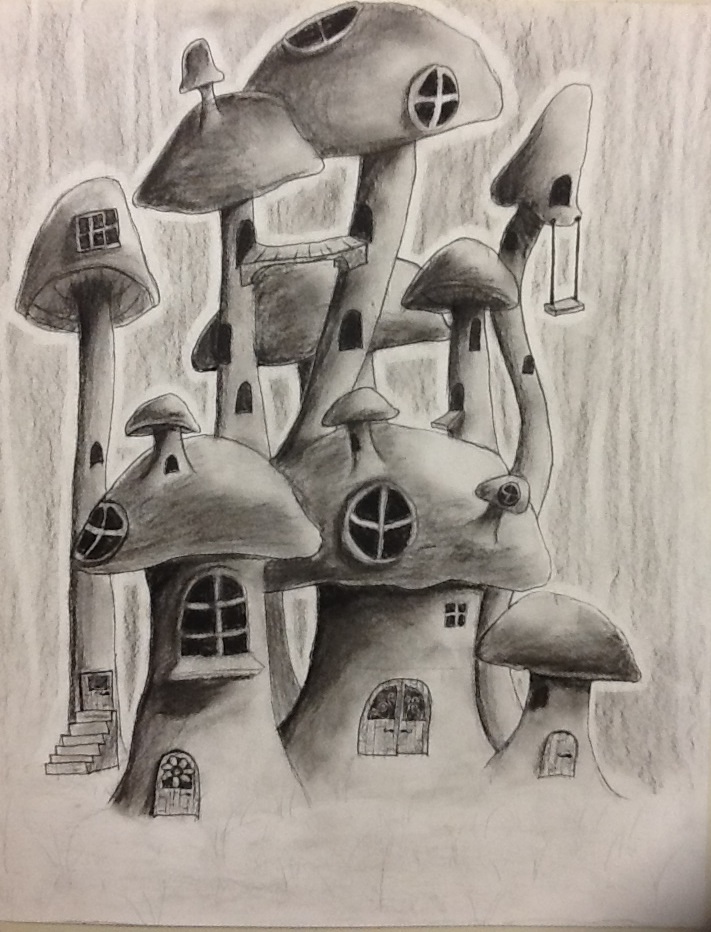


Here is one of my high school lessons where my students learned the history about Gothic, Renaissance, and Baroque Art and architecture. Prior to my introduction I set up on a table in the middle of the room different size paper cylinders and cones that resembled a castle as a still-life this made the students curious as they walked in the room.
After my intro I did a demo showing students how to draw the still life. I showed them how to draw one cylinder in front and one behind another. Then I showed them how to shadow them in using charcoal. I explained how they should look at which way the light is hitting the cylinders, and how they should squint their eyes to start at the darkest areas and work their way to lighter shades and value. I had them do this as a practice for one day and told them to brainstorm ideas and to think about their castle, I expressed it can be fantasy or realistic. I gave them examples like the Harry Potter castle, Lord of the Rings castle. I told them their castle can be in water or on land; it was totally up to them.
The following day I showed the students how to draw details like bricks, balconies, doorways, etc. I used the same example from the demo the day prior. I demonstrated how to draw their lines according to their horizon line (see attached).
Once they began working on their layouts several of my students had questions. For example: they wanted me to show them how to draw bridges, roof tops, spiral stair cases, or how to shade in mountains and clouds. I demonstrated on a one to one basis. This is a great way to monitor your student’s artistic growth.
Overall I was very impressed with their ideas and creativity. They really used their imagination to create their castles, Take a look at some of their castles and enjoy.
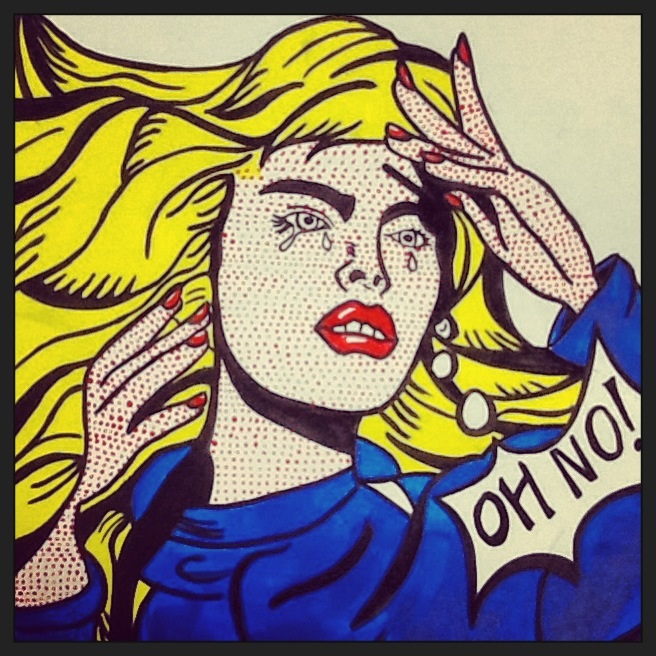

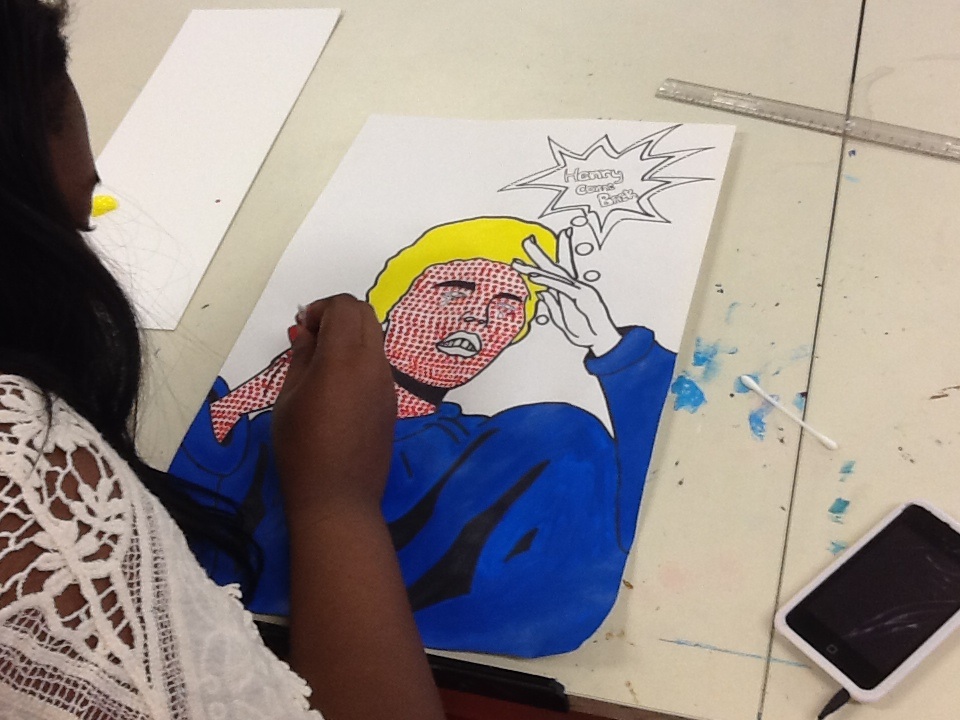

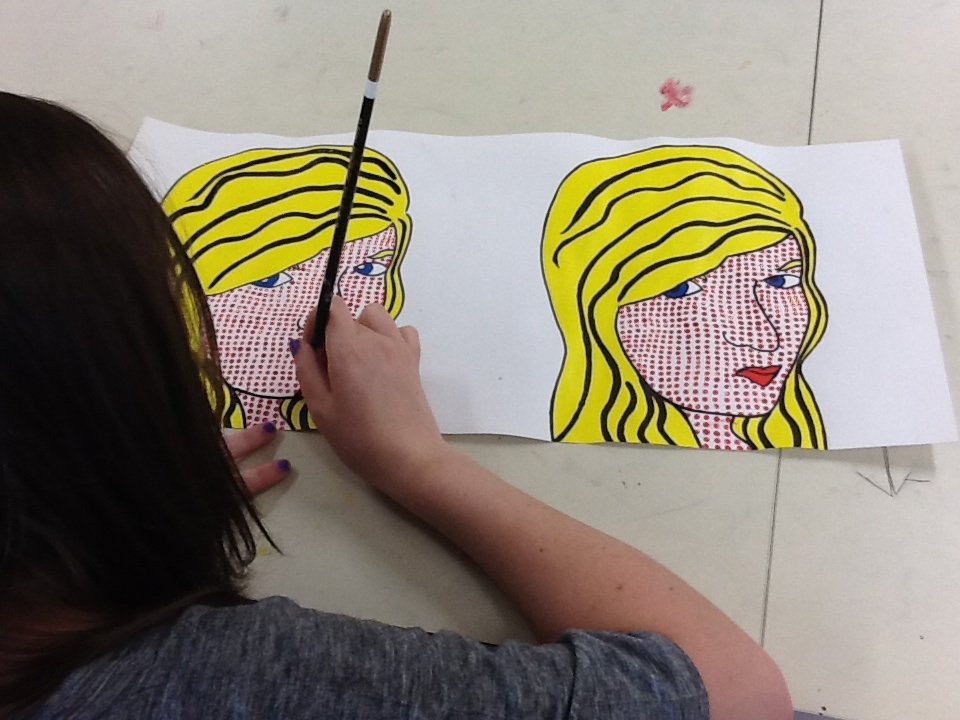

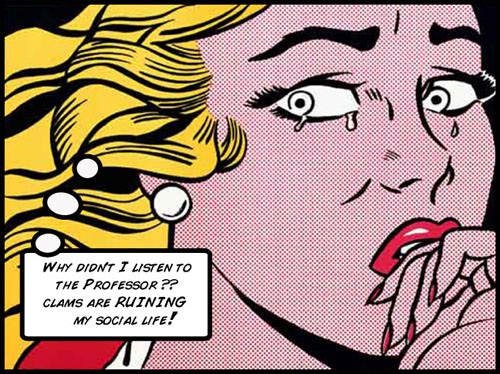

Here is a cool High School Lesson where I introduced Pop Art and the work of Roy Lichtenstein to my students. I showed them some examples and discussed the meticulous use of benday dots. The students first searched for a magazine image of their choice. They then traced the image using contour lines only. They then transferred the image on white paper using charcoal transfer paper. Next students outlined their image using a black sharpie. Students then began to paint their design using primary colors only. I had my students use Q-tips for their benday dots, some chose to use a ruler aswell to line them up properly. Remind your students to practice their dots on a seperate paper prior to beginning. Once students are done with their dots they will use black acrylic to paint everything they outlined in sharpie. I had my students add a caption to give their design a more comic book effect, however it is not necessary. Have fun🎨
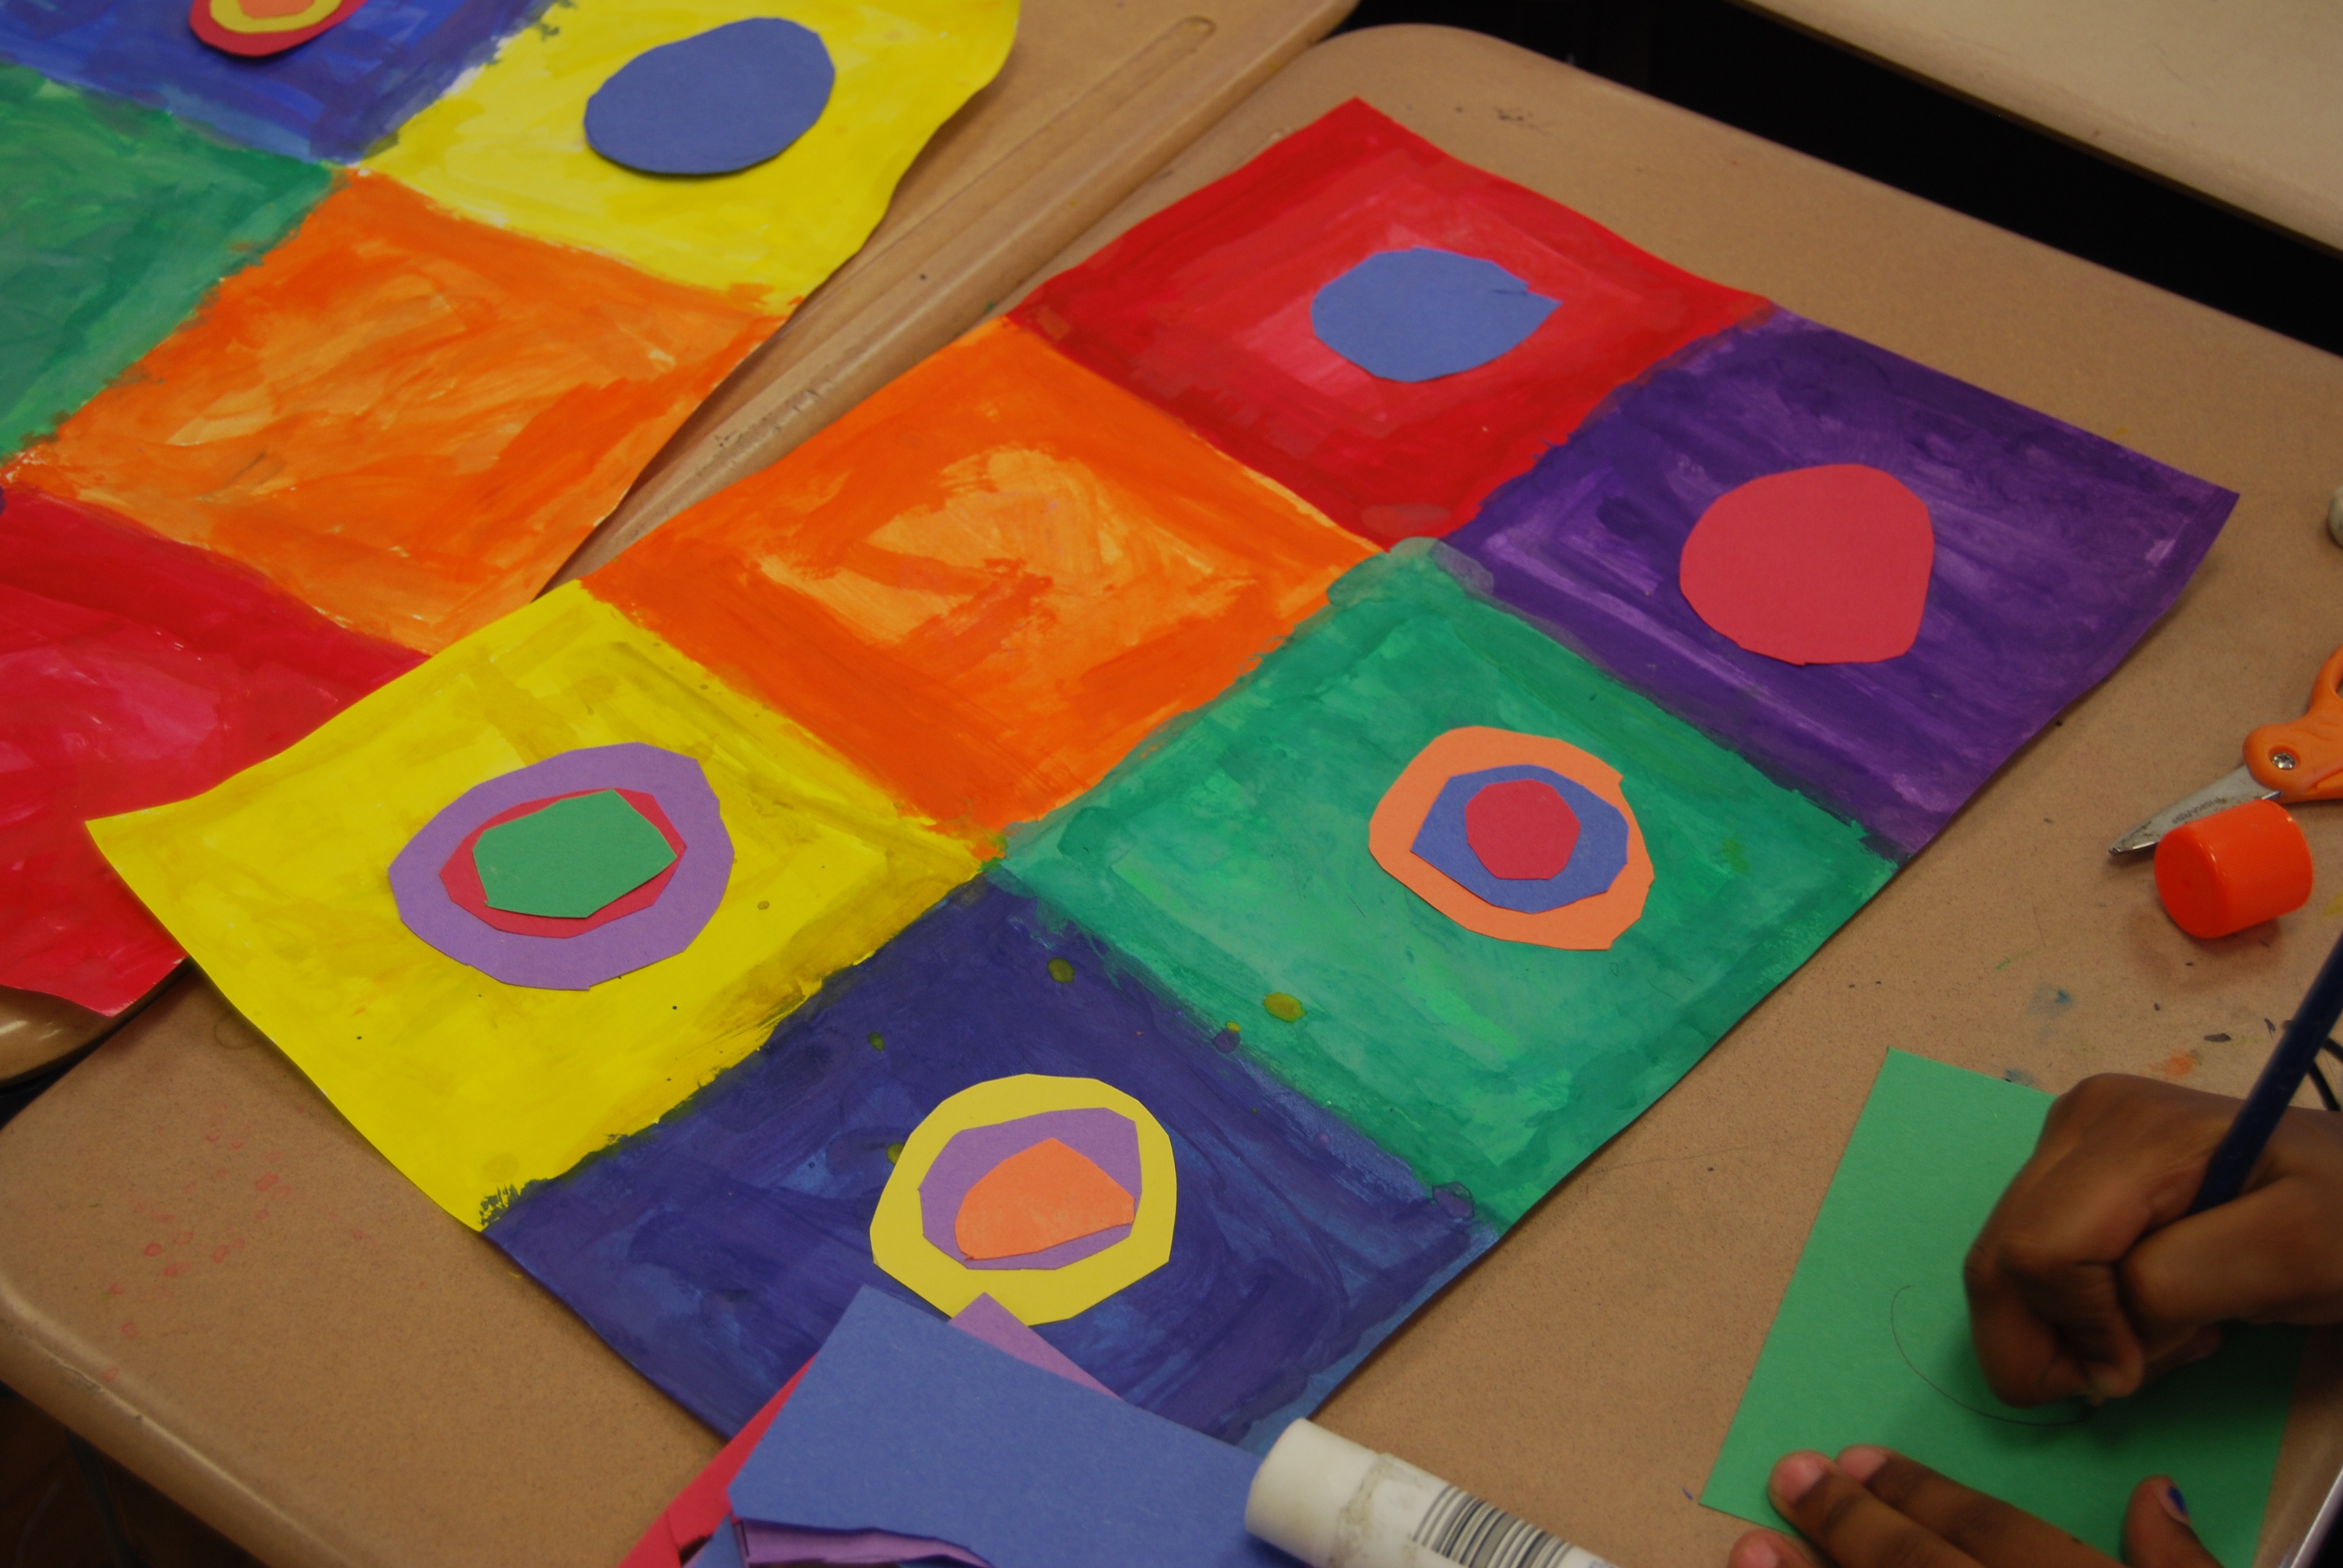
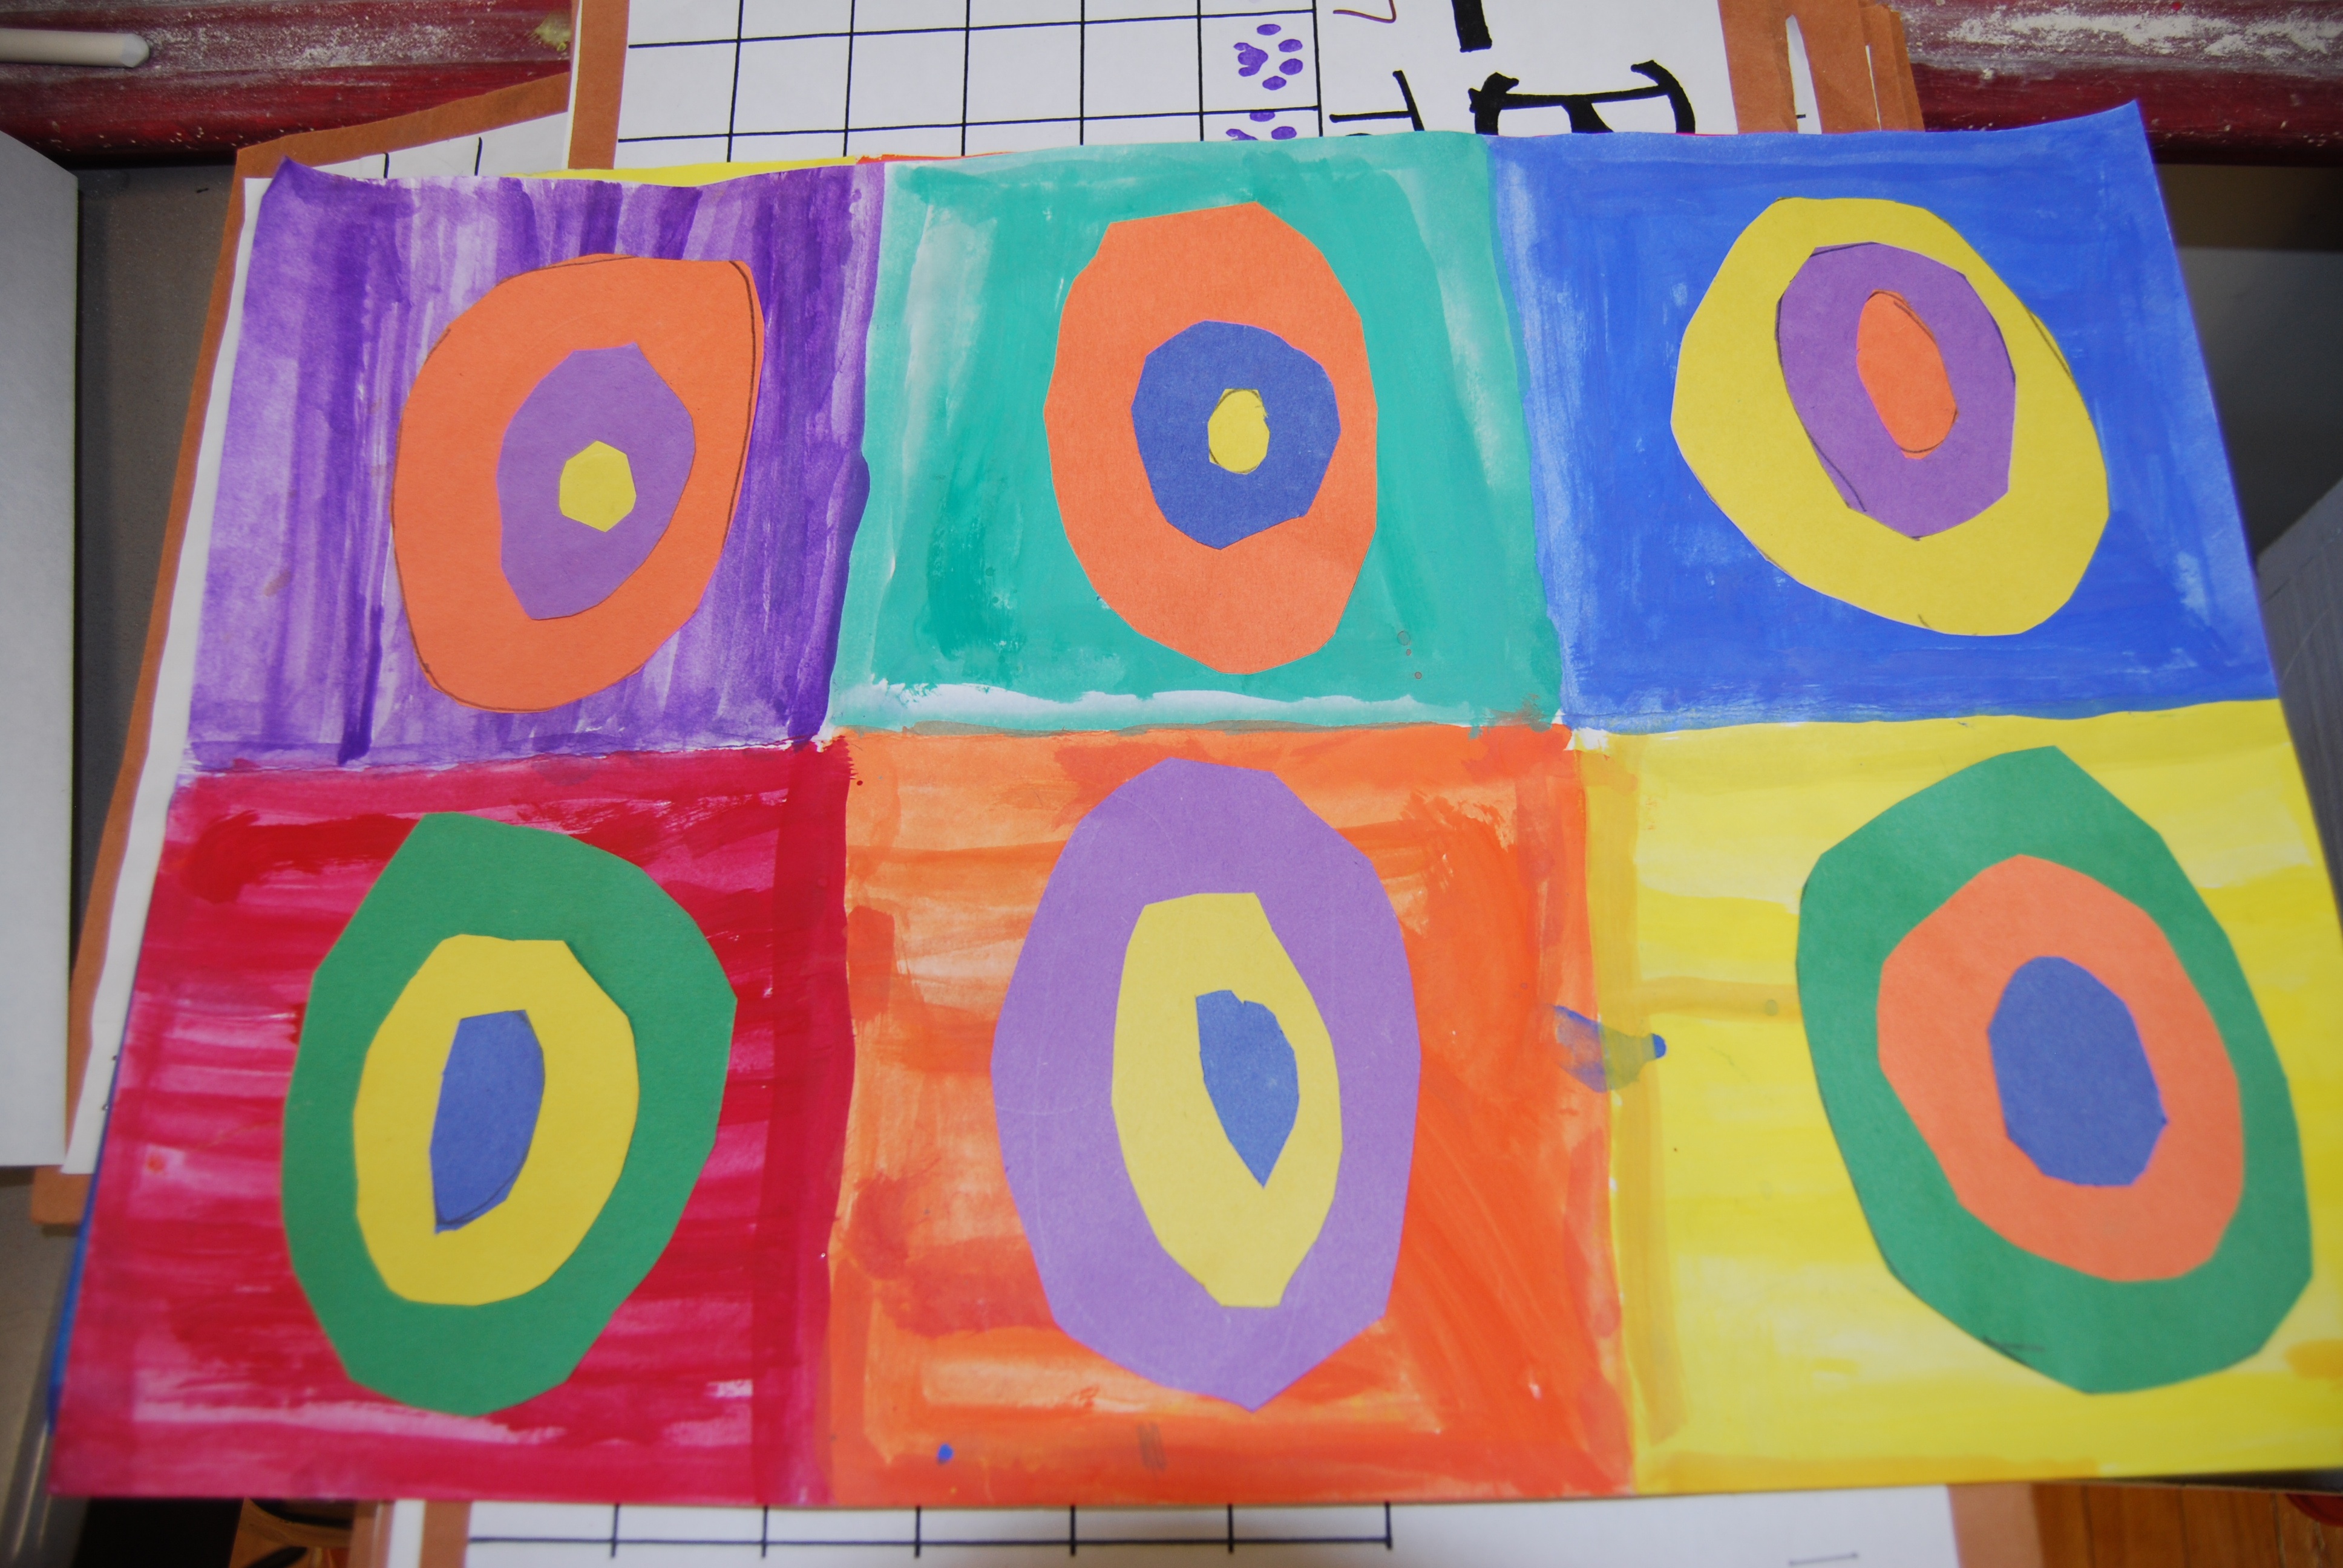
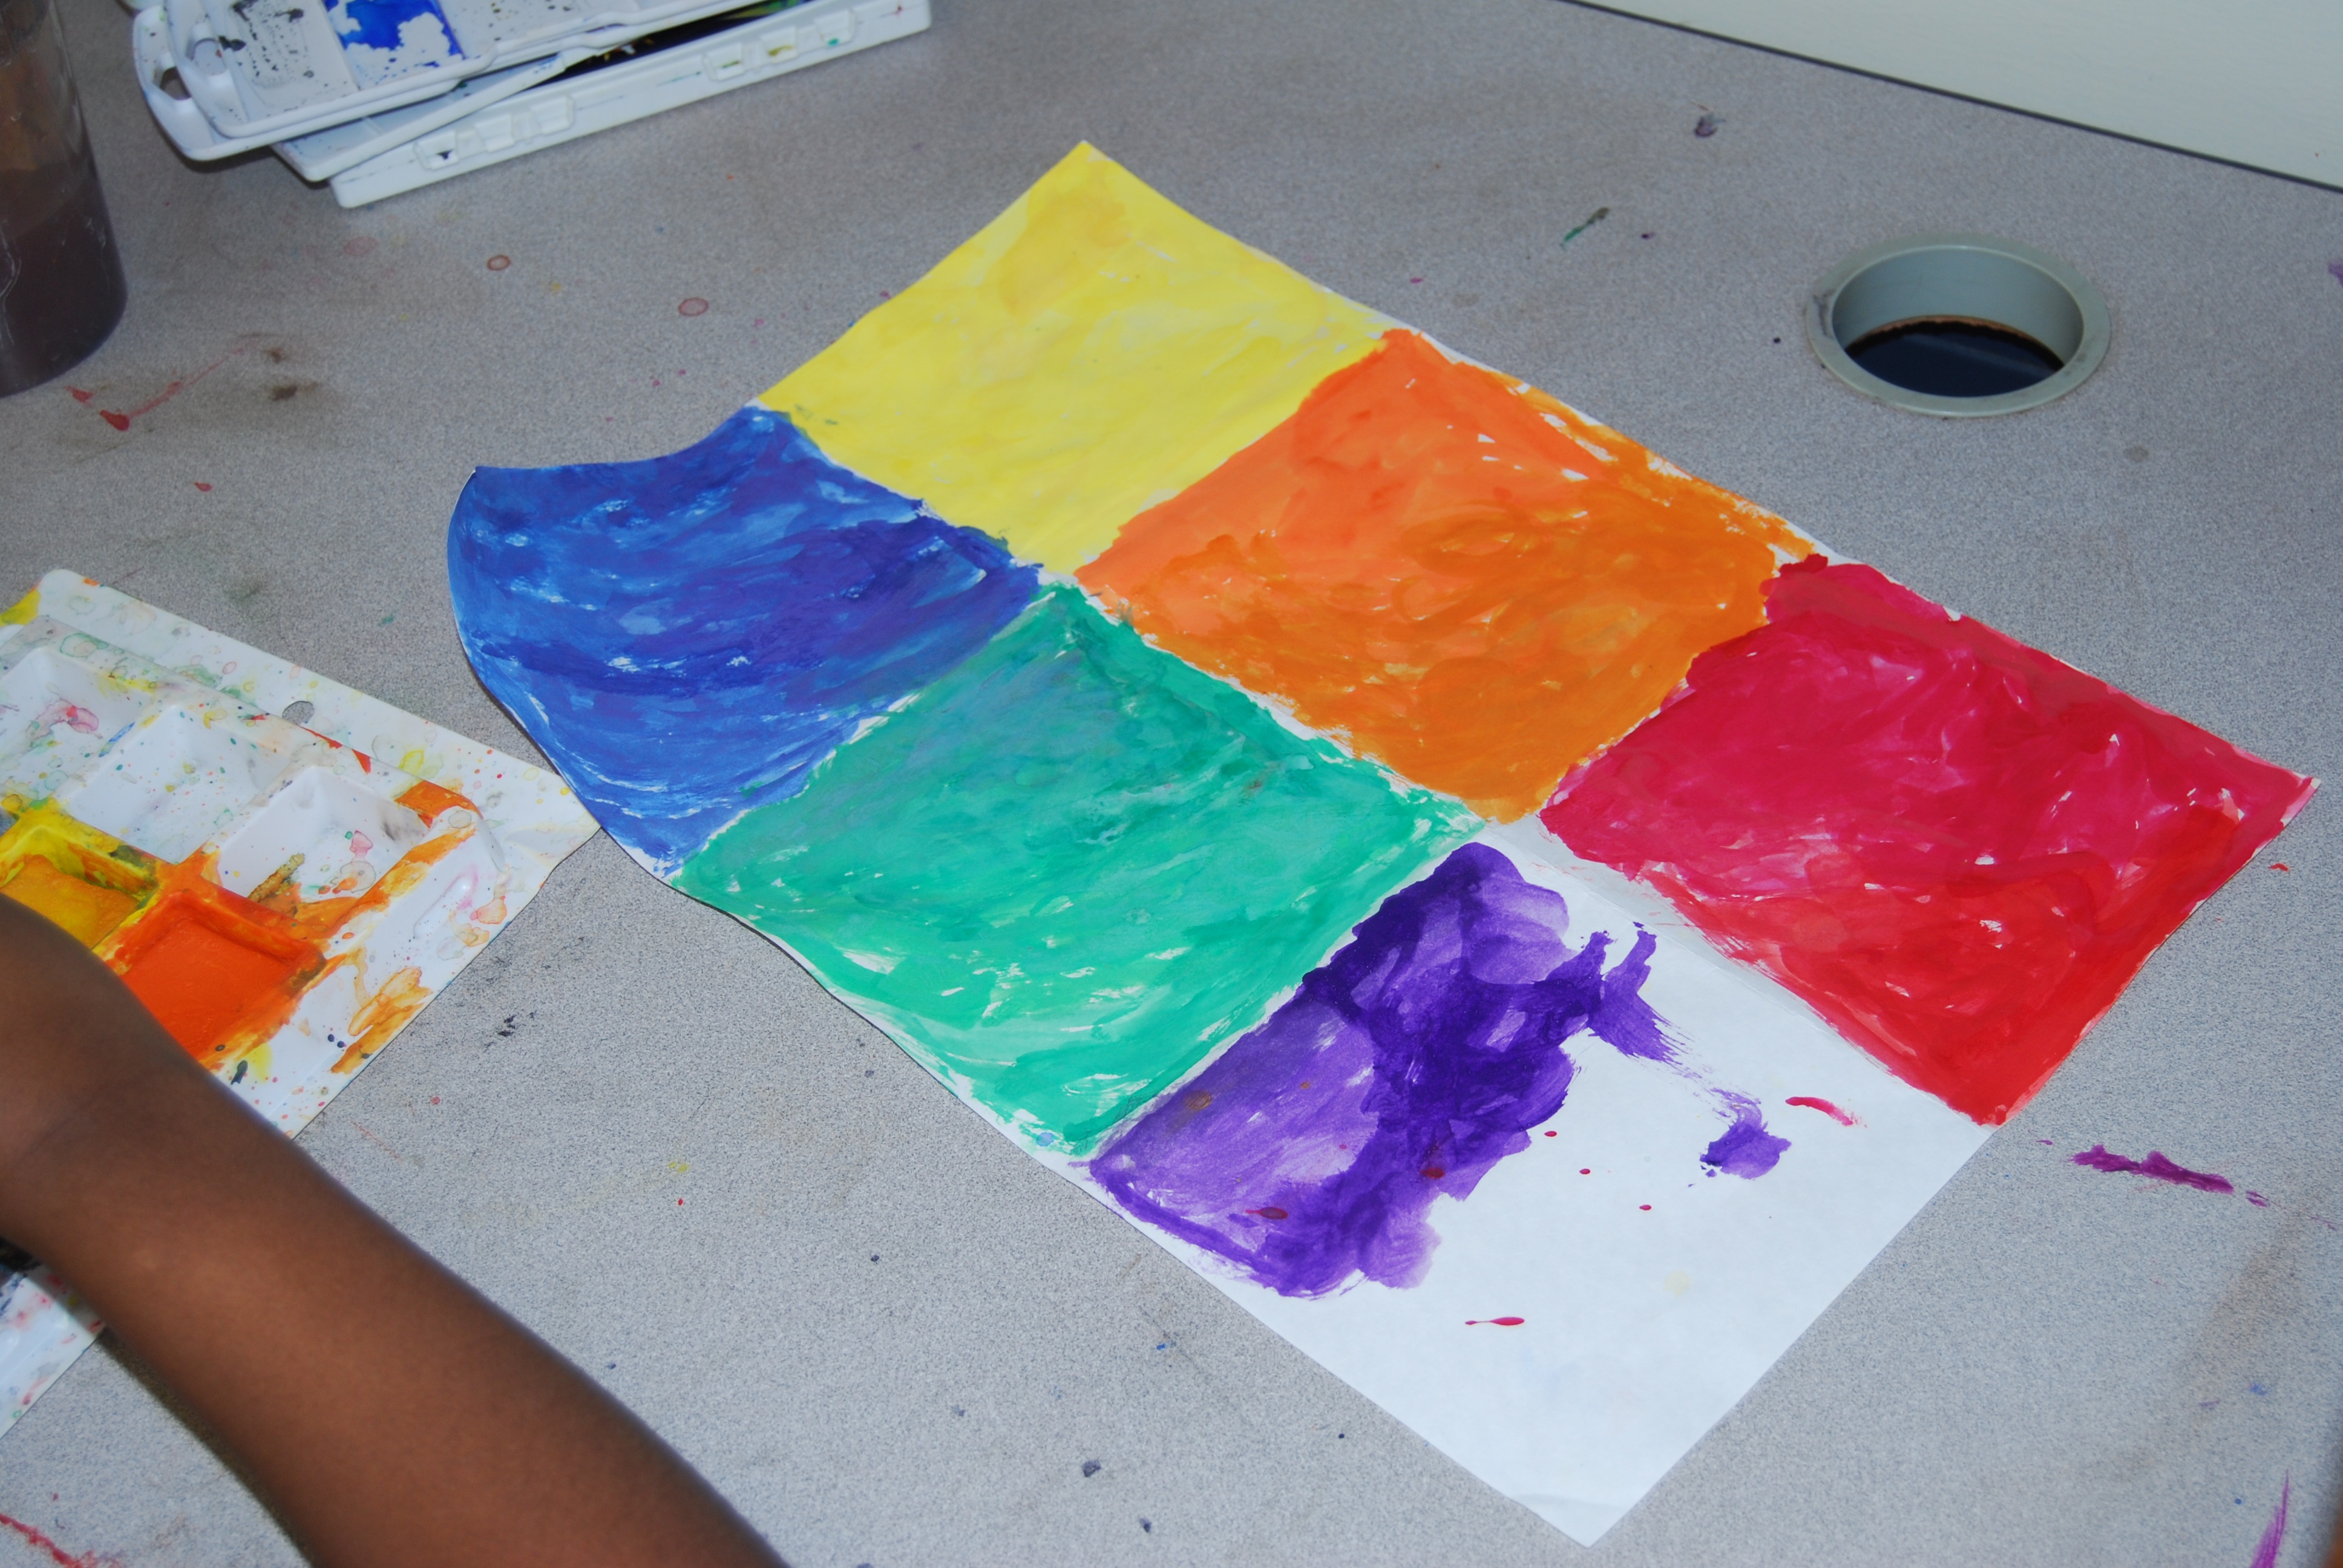
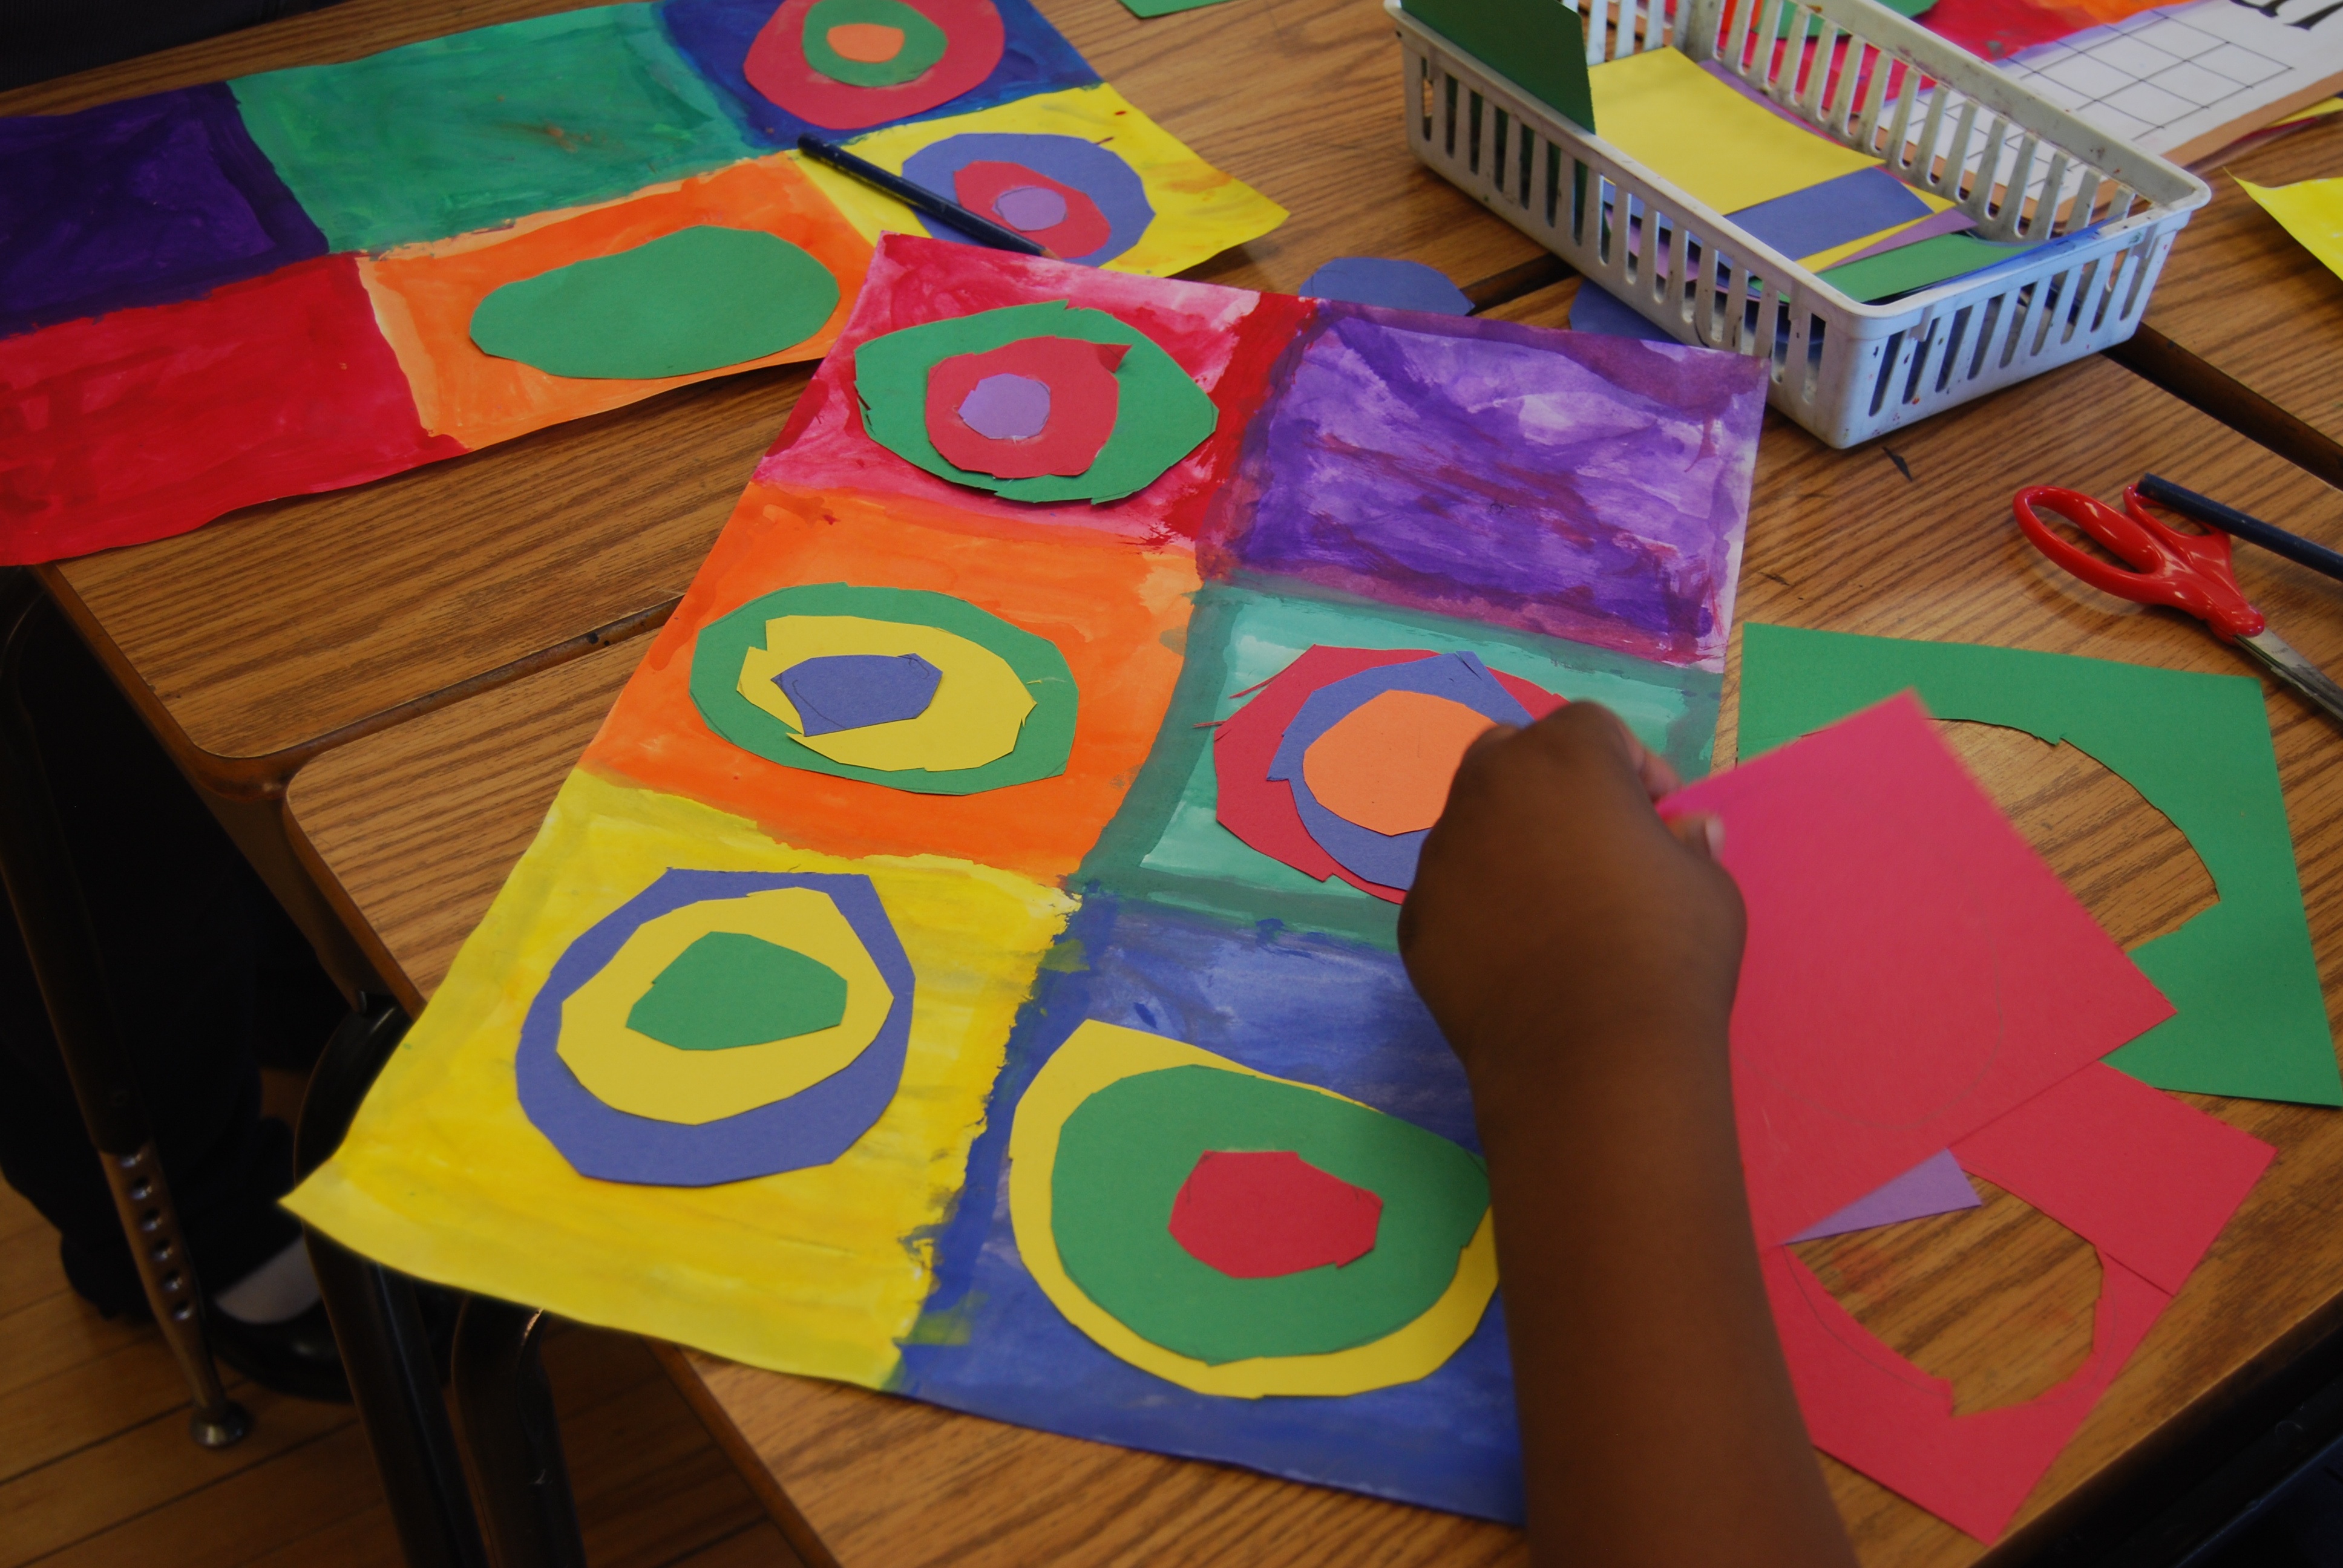
My students learned about warm and cool colors by looking at the art work of Kandinsky. I first had them divide their paper into six squares. I had them paint warm colors first, then we painted our squares in cool colors. I then went over patterns with them and had them make a warm, cool, pattern with their circles. We used colored construction paper for the circles. You might want to remind your students to start with the largest circle and make sure they look at the color of their square to create the pattern. So if their square is yellow, which is warm, their 1st circle should be a cool color, and so on. It gets a little technical however this core relates to math, students should know how to create AB patterns. Remember be Art Smart and have fun. Enjoy😀🎨


 Art Classroom Display of Students Work


This was a fun lesson that my Kindergartners enjoyed. They started out tracing their hand on brown paper. Then cutting it out and gluing it on to the yellow construction paper. We then went over small, medium, and large for the circles. Getting them to differentiate the sizes was challenging however you can modify your lesson by having them either draw small, medium, and large circles on different color paper, or you can have them start out drawing the small circle cutting it out and gluing it onto a different color construction paper. Then have them draw a “Bigger” circle around it, cutting it out and gluing it on to a different color paper. Then draw a “Bigger” circle around that one. They will end up with a three circle pattern that they can now glue onto their branch. Remember be Art Smart and have fun.